Gear Up: Best Equipment for a Solo Bicycle Tour
At long last, a return from my writing hiatus! I have several pieces in the works including a day-by-day recap of my bicycle tour from London to Glasgow. In the meantime, here is a guide for those planning similar escapades. Hopefully some of you will find it useful!
Due credit: a good portion of this article is based on initial advice given to me by the one and only Connor Gabriel when I started distance riding. Check out his Instagram feed and YouTube channel!
Disclosure: this post contains affiliate links. As an Amazon Associate, I earn a commission if you click and make a qualifying purchase (at no additional cost to you). I promise to spend it on coffee while writing more helpful content! The opinions expressed here are my own and based entirely on my experience.
The Bicycle
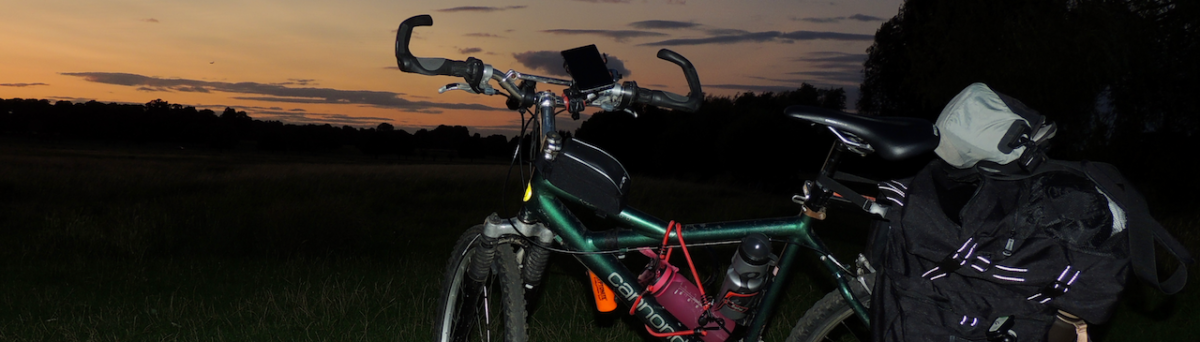
For my 2017 bicycle tour from London to Glasgow, I was using a 1998 Cannondale V 700, an aluminium 8-speed mountain bike left behind by the previous tenant of a flat I’d moved into that year. A price that can’t be beat, though it was in quite a state of disrepair when I inherited it. Although it got the job done, and was useful when Google Maps somehow took me off-road, I will definitely be investing in a proper touring bicycle when I get the chance! Ideally something with a steel frame (heavier than aluminium but stronger, longer-lasting, and easier to repair if needed) and plenty of room to attach bags and accessories. You will want to avoid carbon fibre frames as they are too light for pannier bags. Something like the Schwinn High Timber comes to mind. Is anyone feeling generous? 😉
Most importantly, make sure the bike frame matches your size and is adjusted for your height.
Handgrips
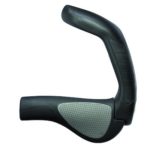 Ergonomics matter on long rides. I highly recommend investing in a pair of Ergon GP5 grips. They are high-quality, fully adjustable, easy to install, and comfortable. Being able to adjust your hand position frequently with ease makes a world of difference. It’s a decision you won’t regret!
Saddle
A good saddle will be sized appropriately to support your “sit bones” with a large seat surface for optimal pressure distribution. There are some who advocate for padded saddles with gel cushions, but arguably these will push a lot of the unused cushioning into your soft tissue and cause long-term discomfort. Better to go with a well-fitted pair of padded riding shorts so that the padding is always where it needs to be. For my tour from London to Glasgow and all of my long rides training for that event, I used an Ergon SMC4-M mountain bike saddle. It was comfortable to sit on for hours and definitely put a stop to the back pain and soreness I was getting from the cheap and worn saddle it replaced.
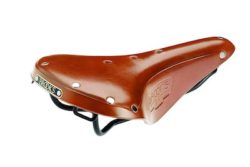 For very long tours where you won’t be racing at high speeds and comfort is paramount, a leather saddle is probably your best bet. My next saddle purchase will almost certainly be the classic and classy Brooks England B17.
Though not essential, you should also consider purchasing a saddle cover to protect against the weather.
Lights
It’s important to be noticed by the multi-tonne death machines you will be riding alongside. That said, there is a balance to achieve here; your bicycle is a road vehicle, not a rave accessory. A rear reflector light and LED headlight should suffice. Make sure the headlight can be aimed slightly downwards rather than straight ahead so as not to blind (and anger) other motorists. Depending on your route and planned stops, you will probably want to carry extra batteries or a power supply as needed.
Clothing
Keeping weight to a minimum is important, so think in layers rather than bulky items. You’ll also want materials that are easy to clean/wash and will dry quickly. In addition to a short-sleeve cycling jersey with rear pockets and riding shorts, I usually bring a couple of t-shirts, and a hoodie/jumper to throw on if it gets cold or I find myself riding at night. A disposable waterproof rain poncho is also very handy! Of course, modify as needed depending on your route and expected weather conditions. A bicycle tour during the winter through snowy terrain will require a different line of thought.
Safety First
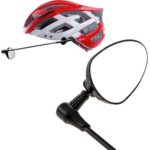 Don’t become a statistic. Invest in a quality helmet that fits properly. Following the motorcycling principle of “all the gear, all the time,” I would never ride on roads serving cars without a reflective safety vest (ideally one with pockets and a breathable mesh). I strongly recommend a pair of ankle reflectors, a cheap investment that will greatly increase the distance and speed at which drivers can recognize you as a cyclist.
Another recommendation is a helmet mirror – though no replacement for shoulder-checking it’s immensely useful in avoiding surprise when cars rush past. You adjust to using it quickly; it’s also cheaper and more space-efficient than a handlebar mirror.
Preventing Saddle Sores
Saddle sores: the distance cyclist’s bane. A curse from the deepest hells sent for us to grit through and triumph over. Arguably unavoidable, you can prevent and minimize them with some decent padded riding shorts – bring two pairs that you can alternate daily to prevent chafing.
Another essential item is a tube of chamois anti-chafing cream. Butt’r gets my highest recommendation! I do not think I would have survived without it. Also carry a few small tubes of anti-septic cream for any sores or blisters that do develop.
Handgear
There are some who dislike wearing gloves while cycling because they can get hot and sweaty, but I think this is well worth preventing painful blisters that most cyclists are familiar with, especially on longer rides. A good pair of cycling gloves should be breathable with padding for shock-absorption and minimizing fatigue.
For further comfort, you can double-wrap your handlebar tape; do this yourself if familiar with the process or ask at your local bike shop.
The Bags
Firstly: Bungee cords are your friend. Buy a decent set and bring a few of different sizes. You’ll be surprised at how often you will need them! I frequently used mine to help secure a wobbly water bottle and to help stop my large bicycle lock from clanging against the side of the frame. Well worth the small purchase!
Panniers
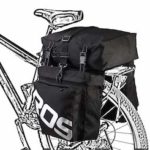 I recommend a set of large-capacity panniers that are water-resistant or at the very least have a rain cover. Roswheel is my favourite brand by far! These panniers are very well-designed, and the top bag is detachable. This makes it convenient for storing valuables such as your laptop or camera as you can take it with you in a snap.
Do ensure that your cargo rack is well-built and strong enough to hold the weight you’re expecting to travel with. Ibera provides a solid choice!
Saddle and Frame Bags
Squeeze in extra storage space wherever you can. Consider a saddle bag if it will fit alongside your panniers. For maximum convenience, a front tube bag is extremely useful for storing frequently used accessories such as your wallet, phone, maps, or multitool. I used mine to keep a power supply so that I could charge my handlebar-mounted phone while still using it for navigation.
Backpack
If, for whatever reason, you cannot attach panniers to your bicycle, your only realistic option for carrying a reasonable amount of kit is a backpack. In this case, having lots of adjustment options is important, and you will have to know how to adjust your riding position accordingly. Look for backpacks with a mesh frame to help keep your back cool. Check out Ventapak’s lightweight spacer for airflow!
The Food
Food is heavy and takes up valuable storage space so I never carry more than about a day’s worth. Generally I just buy food as needed on the go – most of the routes I plan will include at least a gas station convenience store if not something more substantial every day. As with everything else in this guide, adjust as needed depending on your exact plans. Importantly, make sure the food you eat has a caloric benefit. This means avoiding things that are more difficult for your body to digest such as red meat and celery. Nuts and berries are a great source of energy: a small bag of trail mix goes a long way!
Something I could not have lasted without is GU energy gel. I was skeptical at first but ordered a sample pack and was amazed at the difference it made! These convenient little packets help quickly in recovering from fatigue, which makes a serious impact on your speed and daily mileage. I encourage you to try all of the flavours available, but I definitely like Chocolate Outrage and Salted Caramel the best. 🙂
You also won’t regret bringing some GU hydration tablets. These add vital electrolytes to your water and help ensure you are hydrated consistently throughout your journey.
Finally, for off-road adventures, look into bringing some water purification tablets or a LifeStraw filtered water bottle. Dehydration is a serious risk. Should you find yourself in a difficult situation, being able to safely consume water from a river or stream will be potentially life-saving.
The Lodgings
Hotels/Motels/Hostels
The first lesson I learned regarding accommodation is never to book anything in advance. I lost a fair amount of money when plans changed and I never made it to many of the places I had arranged. So I very much suggest improvising here. Any reasonably sized town you end up in at the end of the day will likely have a bed for you somewhere, whether it be a national hotel chain or the upstairs of a local pub. Do your research and plan ahead, but be aware that your plans can and likely will change.
Warmshowers
Think AirBnB for cyclists – and usually free. It can be difficult to find a host in certain areas but absolutely worth a try: Check out www.warmshowers.org and please do offer to host if you are able!
Stealth Camping
Check your local laws but camping somewhere discreet along your route is usually no problem if you set up late and leave early enough. Do stick to the adage of taking only photographs and leaving only footprints.
This will mean needing to pack a lightweight tent, tarp, and sleeping bag. In lieu of a comforter you can bring a knife to cut some grass or ferns to lay underneath your setup.
The Plan
Some final considerations:
Although I don’t recommend booking accommodation in advance, it is still important to plan your route carefully. Be aware of changes in elevation or temperature, and the weather you can expect. This applies particularly if there is a chance you will be riding at night!
I highly recommend bringing two working cellphones with you, as well as a portable power supply or extra battery pack. This proved invaluable when my primary phone broke early into my journey!
After checking your local laws, pack a small safety knife for emergencies. Also for emergencies, this should go without saying, but always ride with a basic first aid kit. This is something you don’t want to miss when it is needed! Similarly, always carry a small but high-powered flashlight with some extra batteries on hand. It will be especially useful if any repairs or adjustments are needed at night.
Remember your essential riding gear: a multitool (tested on all screws/bolts on your bike), replacement inner tubes, a couple of tyre levers, and a puncture repair kit for the inevitable encounters with thorns, nails, rocks, or other debris on the road.
Please bring plenty of sunscreen, and bug spray if needed depending on the season and locale. If you plan on camping it is probably a good idea to have some bear spray or pepper spray on hand for unexpected encounters.
Finally, so far I’ve assumed you are riding alone. If riding in a group you will not have to carry as much and can share resources between the group. Also make sure you practice signalling with each other and safe drafting.
Training Routine
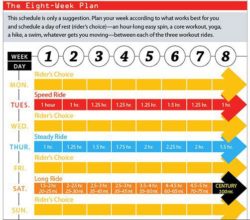
For my ride I had planned just under 100 miles every day. I decided to work up to this by following Bicycling.com‘s eight-week training plan, extending it to the ~12 weeks I spent in preparation. Three weekly sessions to build speed, stamina, and strength. During your training rides you should always load up your panniers with as much weight as you expect to carry for the real event. Maybe more. Those extra pounds have a big impact on the effort required!
Mental Preparation for Your Bicycle Tour
A final note: this is not supposed to be easy. It was probably the most difficult thing I’ve ever done! Interspersed with the awesome experiences, there will be pain. Intense pain and soreness that you can only grit your teeth through and carry on. There will be unexpected setbacks. Moments when you want to give up. Having a strict time constraint (a wedding to attend in Glasgow) kept me going. Next time I will probably ride at a slightly more relaxed pace! Deciding to take on a challenge like this should not be a quick decision. It requires absolute dedication, and raw effort. But for me, it was absolutely worth it, and the sense of accomplishment when I rolled into Glasgow is undescribable. Be safe friends, but also be bold, and triumphant.
What do you think? Anything I missed? Anything you would do differently? Leave a comment!


Really awesome post man! I am so glad the small tips proved useful! Keep riding! 🙂